
In my last post, I addressed how to measure square feet or acreage of an area. Though this applies to any area you want to measure, I specifically had food plots, gardens, and flower beds in mind. So, now that we know the area, what’s our next step? Now we need to determine the quality of our soil and how we might need to amend it to create an environment that is optimal for growing the plants we desire. The only way to do this is by taking a soil sample and having it tested.
I know this sounds like a complex scientific endeavor but, fortunately for us, all we have to do is take the sample and leave the scientific part to the scientists. Taking a soil sample and getting it tested is a very easy process.
Step 1: Get a Sample Kit
There are several online companies that offer kits and soil testing but, here in Louisiana, I find it easiest to visit the local Ag Center Cooperative Extension Office and pick up as many kits as I need. Most states probably have the equivalent of a cooperative extension office. Ours offer the kits for free and you pay for the actual test.
Step 2: Take The sample
Before I get into this, I should do a little housekeeping. There is the “sample” and there are “mini-samples” that make up the “sample”. Stay with me!
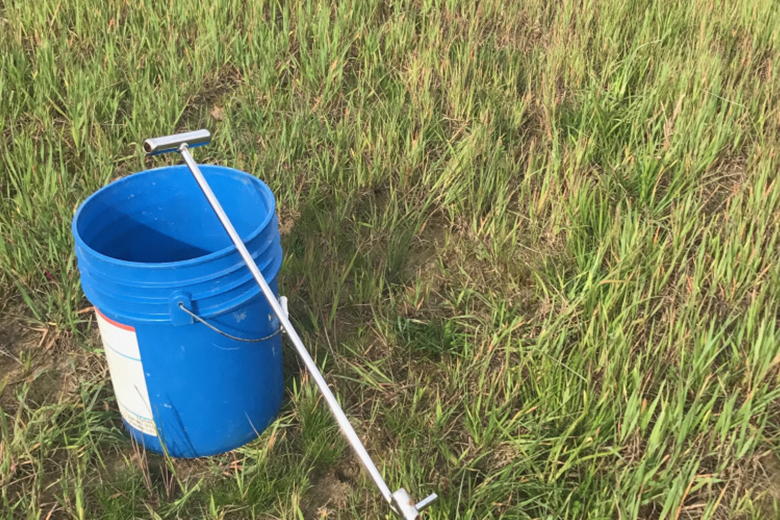
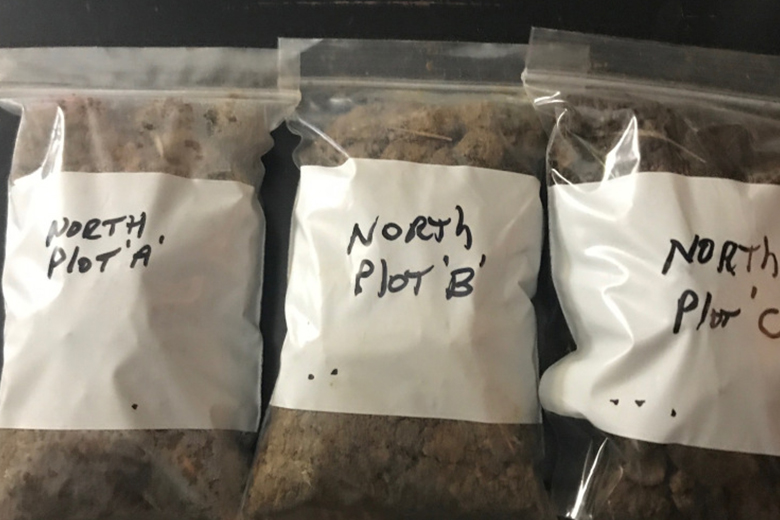
You want to take a grid of mini-samples of the top 6″ – 8″ of soil throughout the plot, garden, or bed. Obviously, the bigger the area, the more mini-samples you’ll need to get an adequate representation of the area. The tool you use to dig the sample doesn’t matter. It can be a spade, shovel, sharp shooter, or soil probe. Whatever works for you. The important thing is to get samples from all quadrants. Each time you take a mini-sample, dump it in a bucket. The reason your bucket should be relatively clean is that you don’t want outside contaminates that might affect the test results. When you’re through taking mini-samples, mix them all together. The mixture should be a representation of the whole area and that is “the sample”. From that, fill the bag provided in the kit. Label the bag so you’ll know where the sample came from. This is very important if you’re testing more than one plot or bed.
In all the kits I’ve seen, there’s a form to be filled out and a list of crops and vegetable groups. This list even includes fruit trees, flowers, and grasses. On the form, you’ll be asked to specify what you are planning to grow. The kit I use allows you a maximum of three crop types per sample. So if I’m planning to grow oats, clover, and winter peas in my fall food plot, I’ll list those. My test results will then tell me how much fertilizer I need for each one and whether or not I need to adjust the pH. If the pH is low, it will tell me how much lime I need to add to make it right. I do the same thing if I’m testing a garden that I plan on growing squash, tomatoes, and okra in. Of course, you can have only one or two crops if that’s all you plan to grow. I tested my yard and St. Augustine grass was all I listed.
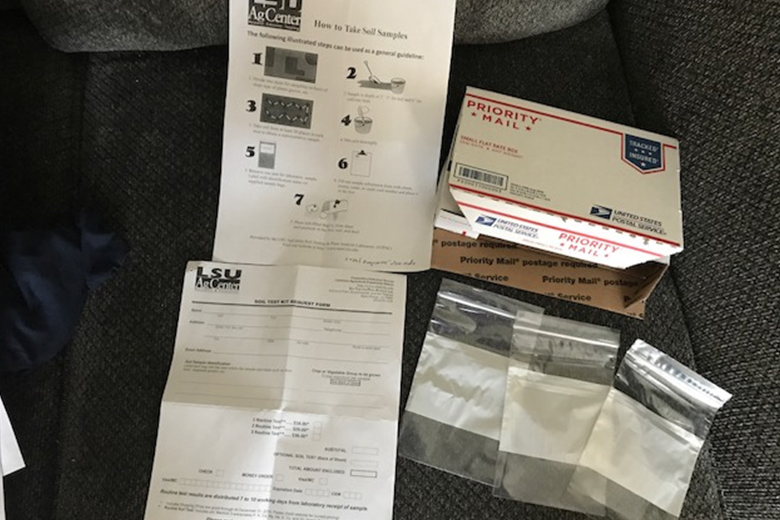
Next, I put the bags of dirt, the form I filled out, and my payment (check) in a self-addressed, postage paid box that came with the kit and drop it in the mailbox. I usually get the results in about 10 days.
So are you tired of the word “SAMPLE” yet? Let’s move on.
Step 3: “Deciphering” The Results
I’m including an example of a test result I received while preparing to plant a 1/2 acre cool season food plot in forage oats. The first item I want to check is the soil pH. I want a value of 6 – 7, but notice that it’s only 5.56, which is low. I then look at the Recommendation and it tells me that by adding one ton of lime, per acre, I’ll bring the pH up to 6.44, which is optimum. Since my plot is only 1/2 acre, I “only” need 1000 pounds. That could be in the form of 20 50-lb sacks of pellet or barn lime or a 1000-lb pile of agriculture lime. I have used them all and each has its advantages and disadvantages. The pelletized variety comes in sacks, making transporting it easy, and can be spread in a regular fertilizer spreader, making application also easy. The drawback is that it’s by far the most expensive. Barn lime is about half the cost of pelletized and also comes in sacks. However, because it’s in powder form, it won’t pass through a fertilizer spreader. Therefore application is problematic unless you happen to have a lime spreader. I usually just scatter each sack by hand but the labor is very intensive. The other common option is agriculture lime. Though the product itself is the least expensive, it has two disadvantages. Since it’s mostly sold in bulk and not in bags, transportation can be a problem. I often pay to have it trucked, which cuts into the amount you save with the inexpensive product. It also doesn’t work well in a fertilizer spreader, so application can be difficult. Once any of the three options is in the soil, it will affect the pH. Keep in mind that lime moves very slowly through the soil profile, often taking several months to reach full effect. Therefore, if you apply it right before planting, it may not help that particular crop. Do it anyway! You’ll at least be helping future crops. The importance of improving pH can’t be overstated. This will double your fertilizers efficiency and greatly improve yield.
Now we turn our attention to fertilizer or, more specifically, the macro-nutrients nitrogen (N), Phosphorus (P), and potassium (K). Potassium is often listed as potash. Your test result will tell you how much of each the soil needs for your specific crop or crops. In my example, I need 160-200 lbs/acre of nitrogen, 100 lbs/acre of phosphorus, and 60 lbs/acre of potash (potassium). If you happen to be located close to an ag co-op, you can take your test result to them and they can custom mix your fertilize in bulk. Most of us, however, are forced to buy ours from the selection at a local hardware store or the lawn and garden center at a big-box store. If that’s the case, you’re probably stuck with limited options like 50 lb. bags of 8-8-8, 13-13-13, 8-24-24, or 33-0-0. Each number represents the percentage of each nutrient, by weight, in the fertilizer. I’d like to avoid getting bogged down in math but there are a couple of things you need to remember. Using 13-13-13 as an example, the number 13 means there’s 13% of each element in the bag. If it’s a 50 lb. bag, there will be approximately 6.5 lbs of each nutrient inside. So, if I need 160 lbs. of nitrogen, I’m going to need almost 25 bags, per acre, to get me there. This is where it gets depressing. At around $15 to $17 per bag, it gets expensive! You could get your nitrogen with fewer bags of 33-0-0 but the two zeros behind the 33 tell us that there is no phosphorus or potassium in that mix. Since my result tells me I need 100 lbs. of phosphorus and 60 lbs. of potassium, that doesn’t do me a lot of good. I can, however, save a little money by mixing it up. For example, 15 bags of 13-13-13 and 4 bags of 33-0-0 would give me roughly 163 lbs. of nitrogen, 97 lbs. of phosphorus, and 97 lbs. of potassium. The first two look good but I have a good bit more potassium than I actually need. The bad news is that this is about the best we can do, given the choices that our local stores give us. The good news is that 37 more pounds of potassium won’t hurt. Keep in mind, many food plots and gardens are well under an acre and these numbers would be adjusted accordingly for that. Most flower beds are so small that you’d be dealing with square feet and not acres.
For anyone reading this that is knowledgeable about soils, I realize I only covered the macro-nutrients and plants need micro-nutrients as well. However, it’s been my experience that if I cover the macro’s, I’ll be okay. If do that and still have problems with my crop, I can then look back at my test result and see if my numbers for things like calcium, magnesium, or sulfur are out of whack. F.Y.I., liming will usually take care of the calcium and magnesium levels.
The Take-Aways:
Since I’m tired of writing and you were probably tired of reading a long time ago, I’ll stop here. The key points I want you to remember are to get your soil tested and amend it according to the results. On almost every location I’ve tested here in the south, the soil fertility needed improvement. Nitrogen, phosphorus, and potassium are crucial in nearly every aspect of plant growth and having the correct pH allows those nutrients to be available. In the piney woods region of Louisiana, where I manage a lot of land, the soils have very low levels of phosphorus. Since deer get their nutrition from the plants they consume and phosphorus plays a vital role in bone and tissue growth, it’s no wonder this region isn’t known for producing large-antlered bucks. Soil fertility matters and, if you’re going to go to the effort and expense of planting, you might as well realize the benefits of doing it right.